dojox.editor.plugins.LocalImage (Under Construction)
| Authors: | He Gu Yi |
|---|---|
| Project owner: | Jared Jurkiewicz |
| since: | V1.6 |
Contents
Have you ever wanted to insert not only online images but also images on your computer? This plug-in is for you.
Features
Once required in and enabled, this plugin provides the following features to dijit.Editor
- Insert an online image.
- Insert a local image on the computer into the document with one click.
- Edit the image when it is selected.
Usage
Basic Usage
First load the CSS. Note that the location of LocalImage.css may be changed according to the actual environment.
@import "dojox/form/resources/FileUploader.css";
@import "dojox/editor/plugins/resources/css/LocalImage.css";
Then load the plugin and Editor:
dojo.require("dijit.Editor");
dojo.require("dojox.editor.plugins.LocalImage");
Once it has been required in, all you have to do is include it in the list of extraPlugins (or the plugins property if you’re reorganizing the toolbar) for you want to load into the editor. For example:
<div data-dojo-type="dijit.Editor" id="editor1"
        data-dojo-props="extraPlugins:[{name: 'LocalImage', uploadable: true, uploadUrl: '../../form/tests/UploadFile.php', baseImageUrl: '../../form/tests/', fileMask: '*.jpg;*.jpeg;*.gif;*.png;*.bmp'}]">
    ...
</div>
If you are running the demo in Dojo SDK, configure the server-side php files as follows.
- Rename dojox/form/tests/cLOG.php.disable to dojox/form/tests/cLOG.php
- Rename dojox/form/tests/UploadFile.php.disable to dojox/form/tests/UploadFile.php
And that’s it. The editor instance you can reference by ‘dijit.byId(“editor”)’ is now enabled with the LocalImage plugin!
Configurable Options
| Argument Name | Data Type | Optional | Default Value | Description |
|---|---|---|---|---|
| name | String | False | localimage | The name of this plugin. It should always be “localimage”. |
| uploadable | Boolean | True | False | Indicate if the plugin supports insert an image from the local file. |
| uploadUrl | String | True | <empty string> | Specify the url that the image is uploaded to. If the argument uploadable is false or not specified, this argument is ignored. |
| baseImageUrl | String | True | <empty string> | The prefix of the image url on the server. For example, an image is uploaded and stored at the following location. http://www.myhost.com/images/uploads/test.jpg When the image is uploaded, the server returns “uploads/test.jpg” as the relative path. So the baseImageUrl should be set to “http://www.myhost.com/images/” so that the client can retrieve the image from the server. If the image file is located on the same domain as that of the current web page, baseImageUrl can be a relative path. For example: |
baseImageUrl = “images/” and the server returns “uploads/test.jpg” The complete URL of the image file is “images/upload/test.jpg”. If the argument uploadable is false or not specified, this argument is ignored. |
||||
| fileMask | String | True | “*.jpg;*.jpeg;*.gif; *.png;*.bmp” | Specify the acceptable image type. The default value is “*.jpg;*.jpeg;*.gif;*.png;*.bmp”. |
Set up the server
This plugin uses dojox.form.FileUploader to transfer the local image file to the server. The file uploader is set to html mode, that is, the image file is transferred as an HTTP request attachment.
The server-side expects ‘uploadedfile’ field in the POST data section. The value of ‘uploadedfile’ is the content of the uploaded image file. The server-side piece could receive it as save it as an image file.
If you inspect the network in Firebug, it could be look like the following:
Content-Type: multipart/form-data; boundary=---------------------------313223033317673
Content-Length: 2457

-----------------------------313223033317673
Content-Disposition: form-data; name="uploadedfile"; filename="test.gif"
Content-Type: image/gif

GIF87a?[image file byte data here]
-----------------------------313223033317673--
The server side should return a piece of html code which contains the following information:
- The path to the uploaded file on the server side.
- File name.
- The width and height of the image.
- Image type.
- Image size.
- ‘additionalParams’ as a list.
All the information should be wrapper within a <textarea> html control. It would look something like the following.
<textarea>{"file":"..\/tests\/uploads\/1079.gif","name":"1079.gif","width":400,"height":118,"type":"gif","size":2260,"additionalParams":[]}</textarea>
For more information, please refer to dojox.form.FileUploader.
User Interface
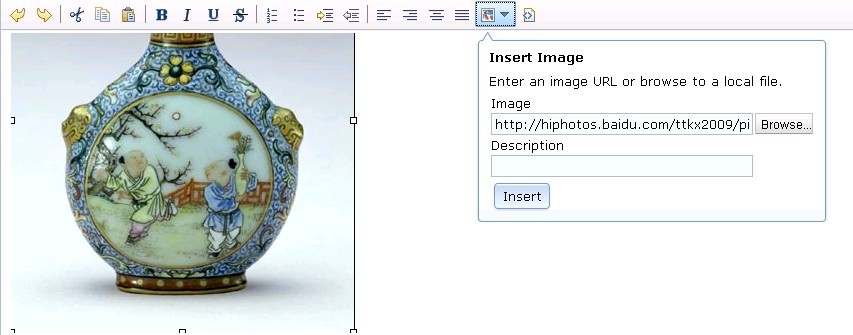
LocalImagePlugin is a plugin for dijit.Editor, which provides the user with the ability to insert images from both network and local files. Click Insert Image to open the tooltip dialog,

Insert a local image file
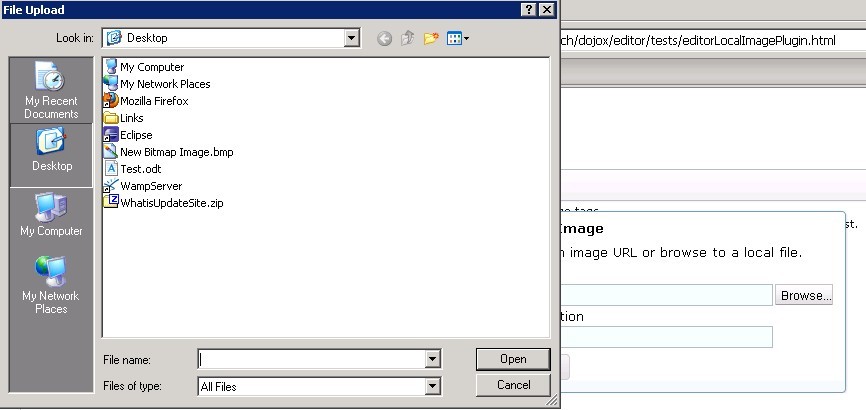
Click Browse... to select a local file and describe it in the Description which will be displayed when the image can’t be displayed. Then click Insert to insert the image.

If the image type is not acceptable, a warning icon will be displayed and the Insert button is disabled.

Insert an online image
Enter the url of the file in the Image field and enter its alternative description in the Description filed which will show when the image can’t be displayed. Then click Insert to insert the online image.

Edit the image
There are two ways to edit the inserted image.
- Double click the image
- Or click on the image and then click Insert Image icon.
The dialog will be displayed with Image field and Description field populated if available. Click Insert to confirm the modification to the image.

A11Y Considerations
All fields within the LocalImage dialog can be accessed with the keyboard.
Limitations
None.
Examples
Basic Usage
dojo.require("dijit.Editor");
dojo.require("dojox.editor.plugins.LocalImage");
@import "{{baseUrl}}dojox/editor/plugins/resources/css/LocalImage.css";
@import "{{baseUrl}}dojox/form/resources/FileUploader.css";
<div data-dojo-type="dijit.Editor" id="editor1" data-dojo-props="extraPlugins:[{name: 'LocalImage', uploadable: true, uploadUrl: '../../form/tests/UploadFile.php', baseImageUrl: '../../form/tests/', fileMask: '*.jpg;*.jpeg;*.gif;*.png;*.bmp'}]">
<div>
<br>
blah blah & blah!
<br>
</div>
<br>
<table>
<tbody>
<tr>
<td style="border-style:solid; border-width: 2px; border-color: gray;">One cell</td>
<td style="border-style:solid; border-width: 2px; border-color: gray;">
Two cell
</td>
</tr>
</tbody>
</table>
<ul>
<li>item one</li>
<li>
item two
</li>
</ul>
</div>