dojox.editor.plugins.AutoSave (Under Construction)
| Authors: | He Gu Yi |
|---|---|
| Project owner: | Jared Jurkiewicz |
| since: | V1.6 |
Contents
Have you ever wanted to save your editing content at intervals so that you won’t lose it by accident? This plugin is for you.
Features
Once required in and enabled, this plugin provides the following features to dijit.Editor
- Save the content immediately with one click.
- Set the save interval and save the content at intervals.
Usage
Basic Usage
Usage of this plugin is simple and painless.
First include the CSS. Note that the location of AutoSave.css may be changed according to the actual environment.
@import "../plugins/resources/css/AutoSave.css";
Then require the editor and plugin into the page. This is done in the same spot all your dojo.require called are made, usually a head script tag. For example:
dojo.require("dijit.Editor");
dojo.require("dojox.editor.plugins.AutoSave");
Once it has been required in, all you have to do is include it in the list of extraPlugins (or the plugins property if you’re reorganizing the toolbar) for you want to load into the editor. For example:
<div data-dojo-type="dijit.Editor" id="editor1"
    data-dojo-props="extraPlugins:[{name:'autosave', url:'dummySave.php', interval:5}]">
And that’s it. The editor instance you can reference by ‘dijit.byId(“editor”)’ is now enabled with the AutoSave plugin!
Configurable Options
| Argument Name | Data Type | Optional | Default Value | Description |
|---|---|---|---|---|
| name | String | False | autosave | The name of this plugin. It should always be “autosave”. |
| url | String | False | <empty string> | The service url which the content of the editor is submitted to. |
| interval | Number | True | 5 | Specify the interval to perform the save action. If it is not specified, the default value is 5 (minutes). |
Set up the server
If you want to use this feature in your application, you need to understand the protocol this feature adopts to communicate with the application server.
AutoSave uses POST method to pass the current content to the server-side piece. The body of the POST request is filled with the editor’s content. The server can get the content directly from the POST body. For example, in PHP environment, $HTTP_RAW_POST_DATA contains the content to be saved.
print(htmlentities($HTTP_RAW_POST_DATA));
User Interface
Save the content immediately
There are two ways to save the content immediately.
- Click the Save button icon to save the content.
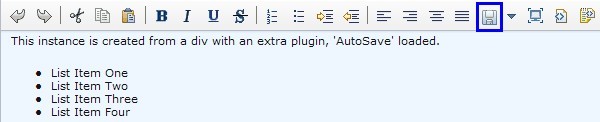
- Or Click the down arrow next to the Save icon and then click Save when the dropdown menu is displayed.

After the content being saved, a tooltip dialog will be displayed to show the time when this content is saved.

Enable auto-save
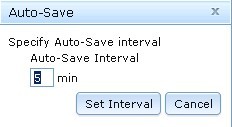
To enable auto-save, click the down arrow and select Set Auto-Save Interval ....

The Auto-Save window will be displayed and the default auto-save interval is 5 minutes, which is specified by the interval argument when the plugin is declared.
- Enter an alternative interval value in the text field if necessary.
- Click Set Interval to save the interval and enable auto-save.
- Or click Cancel to disable auto-save.
After the text being saved automatically, a tooltip dialog will be displayed to show the time when this content is saved.

A11Y Considerations
All fields within the Auto-Save dialog can be accessed with the keyboard.
Limitations
None.
Examples
Basic Usage
dojo.require("dijit.Editor");
dojo.require("dojox.editor.plugins.AutoSave");
@import "{{baseUrl}}dojox/editor/plugins/resources/css/AutoSave.css";
<b>Click the down arrow and select Set Auto-Save Interval... to save at intervals</b>
<br>
<div data-dojo-type="dijit.Editor" height="250" id="input" data-dojo-props="extraPlugins:['autosave']">
<div>
<br>
blah blah & blah!
<br>
</div>
<br>
<table>
<tbody>
<tr>
<td style="border-style:solid; border-width: 2px; border-color: gray;">One cell</td>
<td style="border-style:solid; border-width: 2px; border-color: gray;">
Two cell
</td>
</tr>
</tbody>
</table>
<ul>
<li>item one</li>
<li>
item two
</li>
</ul>
</div>